

Screen recording is one of the important features which is very useful for any productive or personal tasks. If you are making a tutorial or video on any subject with hands-on training, the screen recording feature is very useful. There is much dedicated third-party software available for this purpose like OBS Studio, Tiny Take and Xsplit Broadcaster etc. Even there is an inbuilt screen recorder in Windows 10 but it comes with limitations like supporting only a specific video format and codec support.
VLC Player is one of the most widely used free multimedia player used around the world. It is very lightweight and a simple yet effective media player which can play almost all type of video and audio files. But not many know that you can use VLC player to do screen recording on your PC. Additionally, you can customize the output video format, codec, framerate and audio settings as well.
Here is a simple guide on how to easily record your screen using the free VLC Player.
Record your screen using the free VLC Player
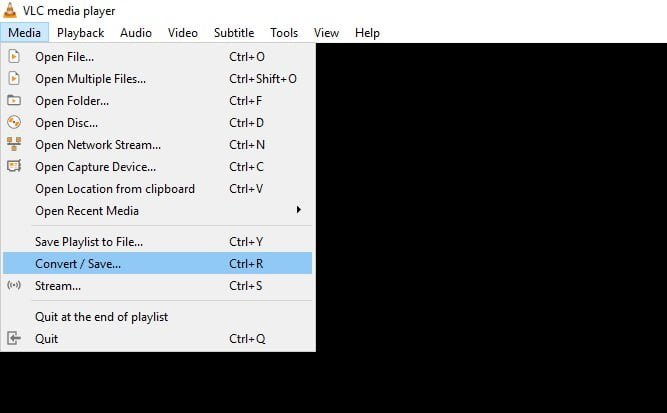
First, after opening the VLC player Click the ‘Media’ menu and select ‘Convert/Save’ option

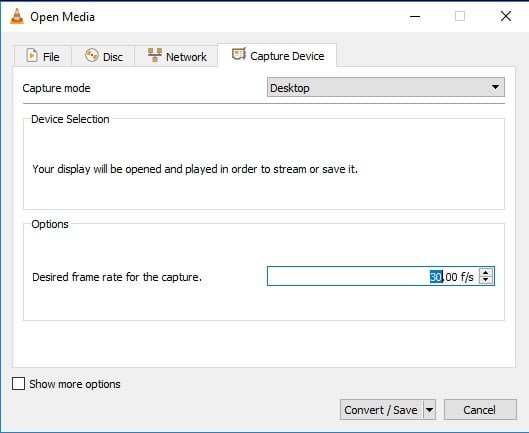
A window will pop up, and here select the ‘Capture device’ tab. Set the ‘Capture mode’ from DirectShow to Desktop.


Then, change the desired framerate by entering either it as 25 or 30fps. By default, it would be set to 1 fps.

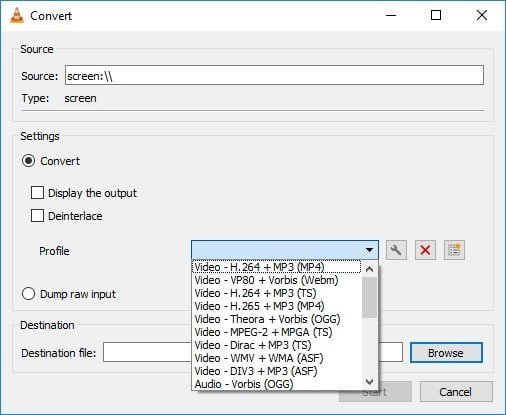
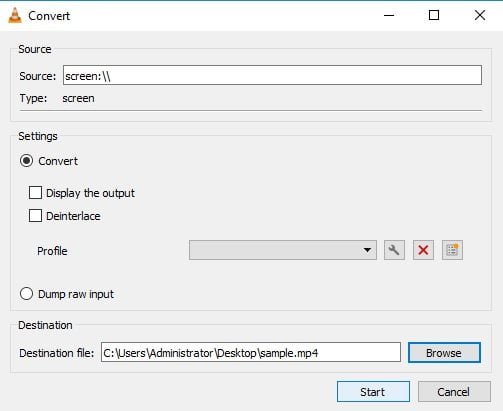
Now click ‘Convert\Save’ button and a new window opens. Here the set the ‘Source’ to screen ( screen:\\). In the Profile drop-down menu, select your choice of video & audio output format.
**The format Video – H.264 + MP3 ( .MP4) is a very common format is supported across platforms, so if you don’t have any specific format requirements suggest to use this.

Also Read: How I Completely Automated My Room using Amazon Echo Dot at only rs 3,5999
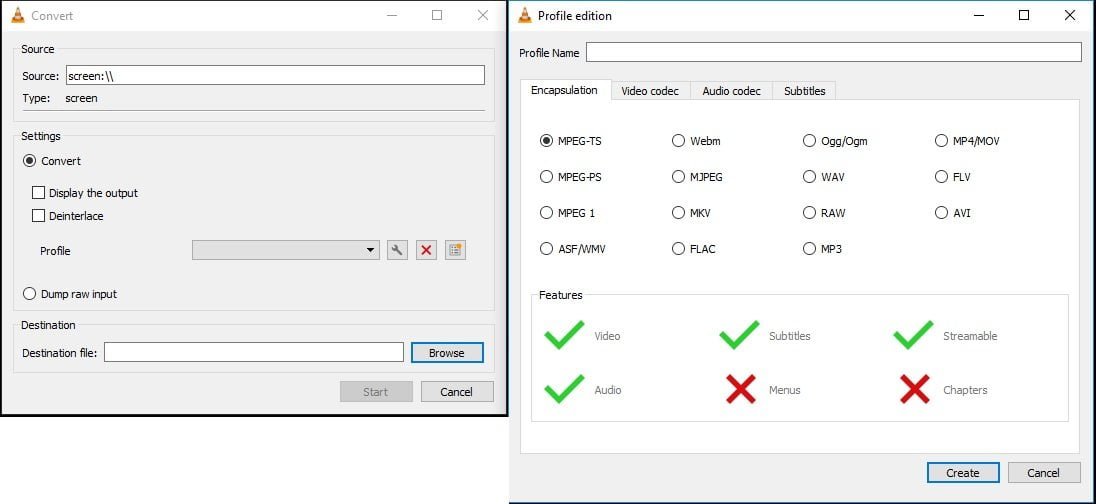
Advanced setup for video & audio of the output video can be done by, clicking the ‘Spanner’ icon.

After done with the setup, set the destination path for the final video to be saved and also name it.

Now, Click the ‘Start’ button to begin the screen recording process and it can be ended by clicking the ‘Stop’ button on the player.


That’s it! So easily done. This is how you can easily record your screen using the free VLC Player. Let us know whether this guide was useful and helped in easing your work. Also, don’t forget to check out our other useful ‘How to Do‘ articles.